A foam roller is one of the cheapest and most useful tools you can own if your back feels tight and stiff. Used well, it helps release tension in the muscles around your spine and hips, eases stiffness and makes it easier to move freely before your stretching or strengthening work. Used badly, it can irritate a sore back even more.
In this post I’ll show you the four areas I have my back rehab clients roll, how to do it safely, and the mistakes to avoid. Foam rolling is part of Stage 1 (stretching and mobility) in my 3-stage back rehabilitation guide.
Why Foam Roll When Your Lower Back Hurts?
Lower back pain is often made worse by tightness in the muscles around the lower back, not only in it. Tight glutes, quads and hip muscles pull on the pelvis and change how your lower back moves, while a stiff upper and mid back forces the lower back to do more than its share of the movement. That’s why a good rolling routine for back pain covers the whole chain, not just the sore spot.
Rolling can also help you relax. Slow breathing combined with slow rolling helps muscles that are guarding a painful back to let go a little.
3 Safety Rules for Foam Rolling Your Back
- Roll muscle, not bone. Keep the roller on the muscles either side of your spine and around your hips. Avoid pressing hard directly onto the bones of your spine.
- Go gently on the lower back. The lower back has less muscle protecting it than the upper back, so keep the pressure light, support your weight with your arms and feet, and stop if the pain increases.
- Slow is better than hard. Roll slowly and breathe out as you move. Rolling fast, or gritting your teeth through sharp pain, makes muscles tense up rather than release.
If you have nerve pain, a disc injury or pain that travels down your leg, check with your health professional before rolling, and read stretching for nerve and disc-related back pain.
4 Areas to Foam Roll for Back Pain
1. Upper Back
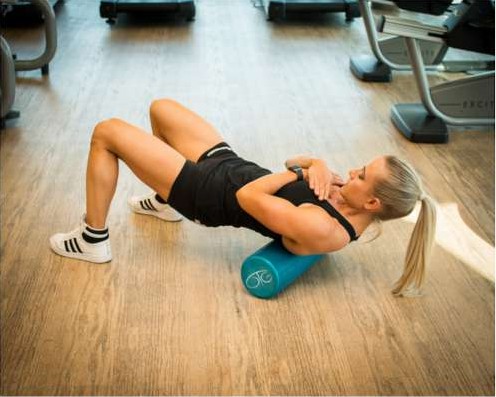
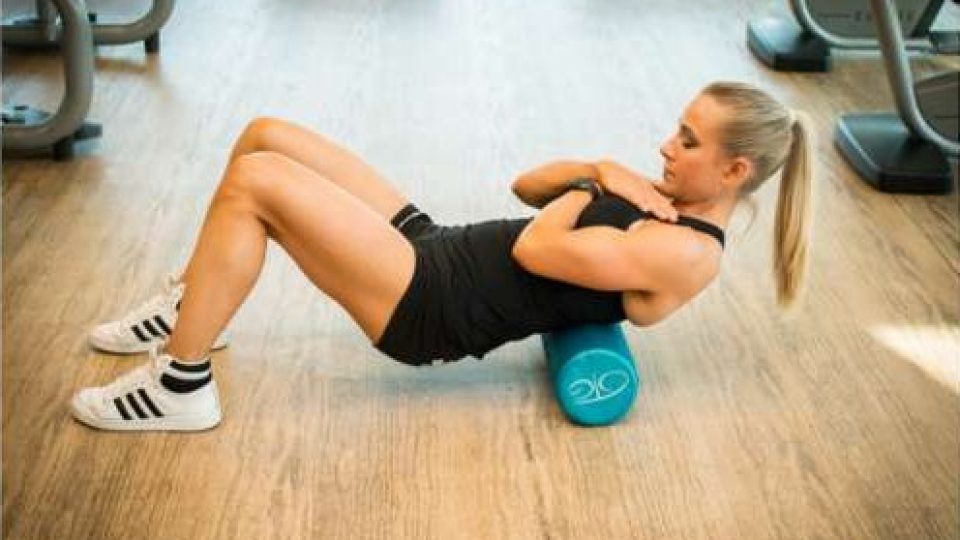
Lie with the roller under your upper back, knees bent and feet flat. Cross your arms over your chest or support your head with your hands. Gently lift your hips and roll slowly between the bottom of your shoulder blades and the top of your shoulders. Keep your neck relaxed.
2. Mid and Lower Back
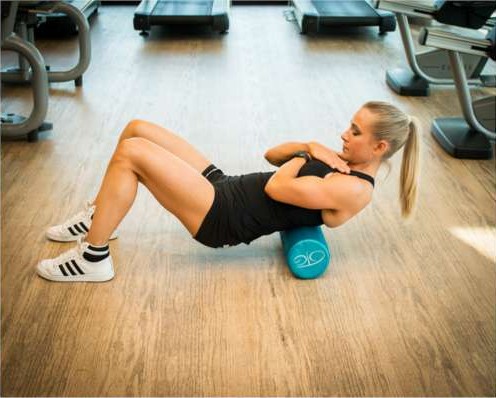
Move the roller down to your mid back and roll slowly and in a controlled way, with your feet taking some of your weight. Only move towards the lower back if it feels comfortable, and keep the movement small. If you feel any sharp or pinching pain, move back up to the mid back.
3. Quads
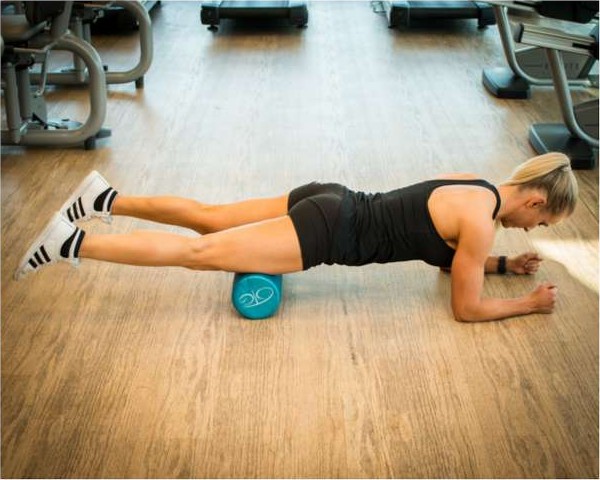
Lie face down with the roller under the front of your thighs, resting on your forearms in a plank-like position. Keep your core gently engaged so your lower back doesn’t sag, and roll slowly between your hips and just above your knees.
4. Glutes
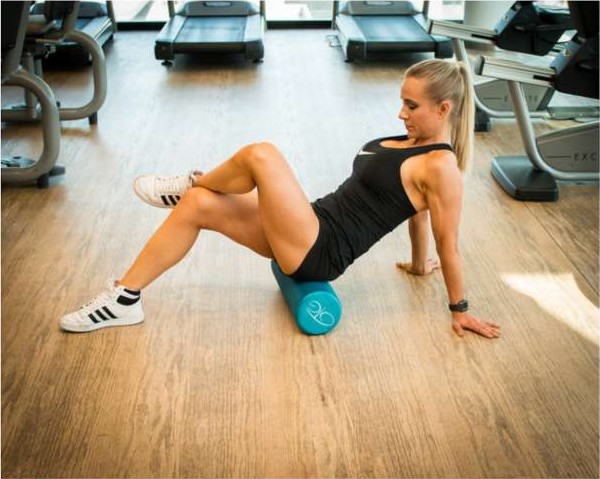
Sit on the roller with your hands behind you. Cross one ankle over the opposite knee and lean slightly towards the crossed leg’s side to target that glute. Roll slowly and pause on any tight spots, breathing out as the muscle releases. Then swap sides.
Tight glutes and hips too? See these hip flexor and glute stretches for tight hips, part of the glute and hip rehabilitation guide.
When Should You Foam Roll?
Rolling works well as a warm-up before your mobility or strengthening exercises, or on its own on days your back feels tight. How long to spend on each area, how often to roll, and where rolling fits into your weekly programme depends on your stage of recovery. That’s all mapped out in the full guide’s workout plans.
Foam Rolling Is a Tool, Not the Fix
Rolling helps you move better, but on its own it won’t stop back pain from returning. For that you need mobility, then a deep core that switches on, then strength. Next, try 6 gentle lower back stretches, then learn how to activate your deep core. New to back rehab? Start with the 7 rules before you exercise.
Want the full programme? The Back Rehabilitation guide includes rolling, stretching, core activation and strengthening exercises (over 30 in total), each rated beginner to advanced, with photos and three ready-made workout plans.
Disclaimer
Please make sure you get a correct diagnosis from a health professional before starting any of these exercises if you are currently carrying an injury, and stay under their advice throughout your rehab.