

Hip pain, tight hip flexors, a sore SI joint or glutes that just won’t switch on are some of the most common problems I see in clients, from runners and gym-goers to people who sit at a desk all day. They’re often connected: when the glutes and the small stabilising muscles around the hip aren’t doing their job, the hips, pelvis, lower back and even the knees pick up the strain.
This guide gives you a structured, three-stage approach to glute and hip rehabilitation: restore pain-free mobility, wake up the stabilisers, then build lasting strength. Each stage links to a detailed article so you can start today.
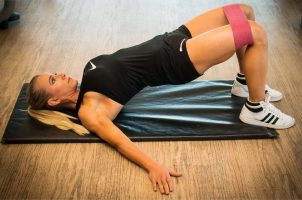
The hip is a ball-and-socket joint surrounded by powerful muscles, while the sacroiliac (SI) joints link your spine to your pelvis. Both rely heavily on muscle support. Long hours of sitting tighten the hip flexors and switch off the glutes; old injuries and one-sided sports create imbalances; and training that never targets the side glutes leaves the pelvis unstable on one leg.
The result can be pain at the front or side of the hip, in the buttock, around the SI joint, or further along the chain in the lower back and knees. Before starting any programme, get a proper diagnosis from a health professional, especially if your pain is sharp, follows an injury or comes with numbness or swelling.
Not sure where to start? Learn the signs of weak glutes and a simple test, or read about gentle exercises for SI joint pain.
Two rules run through every exercise in this programme. First, work only within a pain-free range: mild muscle fatigue is normal, but sharp, pinching or catching pain in the hip or groin is a sign to ease off. Second, keep your pelvis stable. Most hip exercises go wrong when the lower back arches or the pelvis twists to “cheat” extra range, so a gently engaged core and a neutral spine come first.
Find out which movements commonly aggravate sore hips in hip pain: exercises to avoid and what to do instead. New to neutral spine? Read neutral vs imprinted spine.
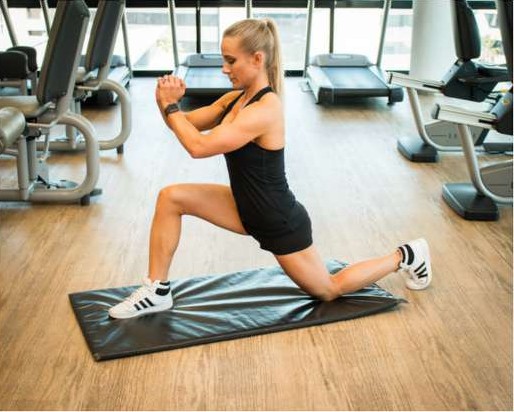
Stage 1 restores comfortable range of motion and eases tension in the hip flexors, glutes, hamstrings and quads. Stretches such as the figure-four glute stretch, the hurdle stretch and the cross over stretch, together with foam rolling, prepare the hips to move freely before you ask them to work harder.
Start with these 5 hip flexor and glute stretches for tight hips, and learn how to foam roll your glutes and quads safely.
Many people with hip, knee or back pain have glutes that barely switch on, so other muscles take over. Stage 2 uses slow, low-intensity exercises such as bent knee fall outs, hip tilts in a bridge, hip hikes and single-leg balance to wake up the stabilisers that keep your pelvis level and your hip joint well supported.
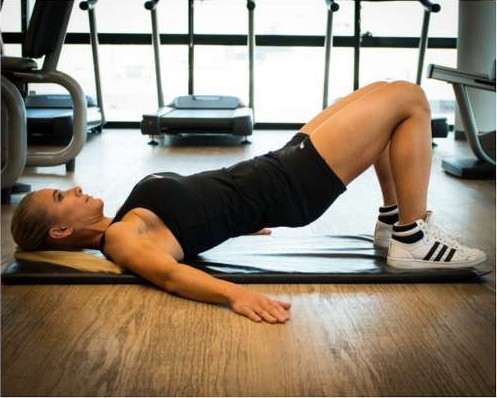
Learn how to do them in glute activation exercises: how to wake up your glutes.
Once your glutes switch on reliably, Stage 3 builds the strength to protect your hips, pelvis, knees and lower back. The programme progresses from bridges, clams and wall squats to banded glute thrusters, step ups, step downs and single-leg work, so you only take on more load when you’re ready.
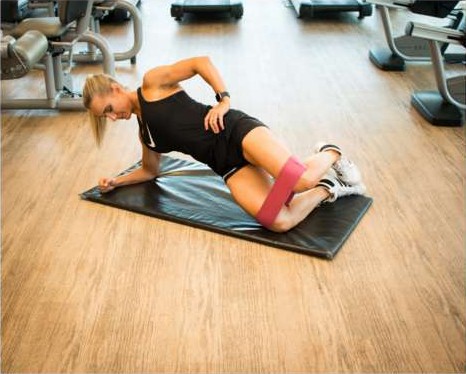
Try these gluteus medius exercises at home with a band, or start with the basics in how to strengthen weak glutes. If your hip pain comes with lower back pain, the 3-stage back rehabilitation guide follows the same approach.
Most of the programme can be done at home with minimal equipment:
Follow these rules throughout: get a diagnosis if you’re injured, stay pain-free, focus on form (film yourself and compare with the photos), and start at level 1 even if you’re fit. Every exercise in the full guide is rated 1 (beginner), 2 (intermediate) or 3 (advanced).
The same principles apply to all rehab. Read the 7 rules to follow before you start.
Answers to the questions clients ask most when starting hip and glute rehab.
It depends on the cause of your pain and how consistent you are. Many people notice their hips feel looser within a few weeks of regular mobility work, but building glute activation and strength usually takes longer, often two to three months of steady progression. Always follow the timeline your health professional gives you.
Yes. Most of the programme needs only a mat, a mini resistance band, a low step and a foam roller. See these gluteus medius exercises you can do at home.
Gentle, controlled movement within a pain-free range usually helps more than complete rest, but avoid anything that causes sharp, pinching or catching pain. See a doctor first if your pain follows a fall, wakes you at night, or comes with swelling, locking or your leg giving way. Read hip pain exercises to avoid.
The sacroiliac (SI) joints connect the base of your spine to your pelvis, one on each side. They rely on the surrounding muscles for stability, which is why glute and core strength matter for SI joint pain. See exercises for SI joint pain.
The programme was created by Sarah Lotter, an online fitness coach with over 17 years of experience and a BSc (Med)(Hons) in Exercise Science from UCT. The exercises come from the programmes she uses with her own rehab and training clients. If you would like a plan built around you, have a look at her online coaching.
Yes. Every exercise is rated 1 (beginner), 2 (intermediate) or 3 (advanced), and the guide includes beginner, intermediate and advanced workout plans, so you can start at your level and progress safely.
Sarah Lotter is an online fitness coach with over 17 years of experience and a BSc (Med)(Hons) in Exercise Science from the University of Cape Town. Over the years she has coached many clients with very different goals, from rehabilitation and injury recovery to athletes, bodybuilders, busy corporate clients and new moms. The exercises in this guide come from the programmes she uses with her own clients. Meet your coach or explore online coaching with Sarah.
This guide gives you the overview, but real progress comes from following a consistent, structured plan.
The complete Glute, Hip & SI Joint Rehab guide includes:
Professional Medical Disclaimer: Please ensure that prior to starting any of the exercises or protocols outlined in this guide, you obtain a correct clinical diagnosis from a qualified health professional if you are currently carrying an injury, and that you remain under the direct advisement of your health professional throughout your recovery journey.
