Guide: 1 = Beginner | 2 = Intermediate | 3 = Advanced.
The purpose of these exercises is to assist the muscles and joints to warm up safely, and to allow for optimal range of motion during each exercise.
Pelvic Tilts (1)
- Starting position: Lying on your back, arms by your sides, head relaxed, small gap between your lower back and the matt (neutral spine – NS).
- Now inhale, and as you exhale, flatten your lower back onto the matt , drawing your belly towards your spine, tilting your pelvis and tucking your tailbone underneath you (imprinted spine – IS).
- Hold this for 2 seconds, and release back to the starting position (NS).
- Repeat this 10 times. 3 sets.
- NB – ensure that this movement is isolated to your pelvis, keep your midback, upper body, neck and arms relaxed throughout this movement.
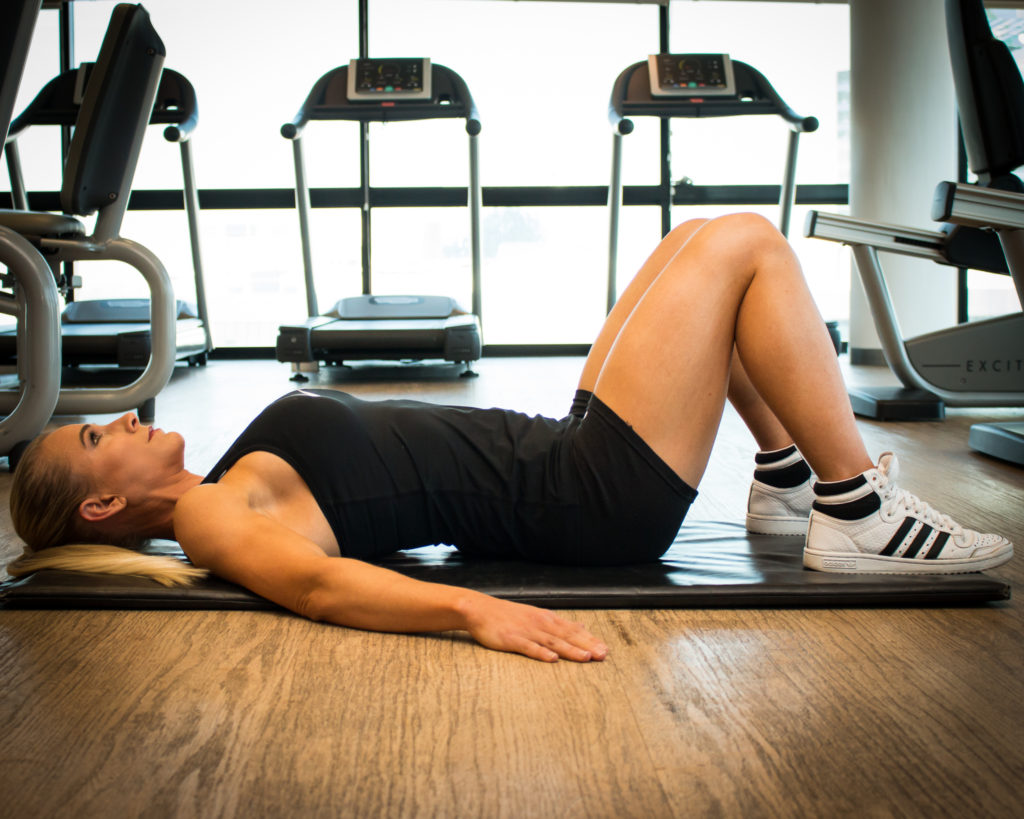
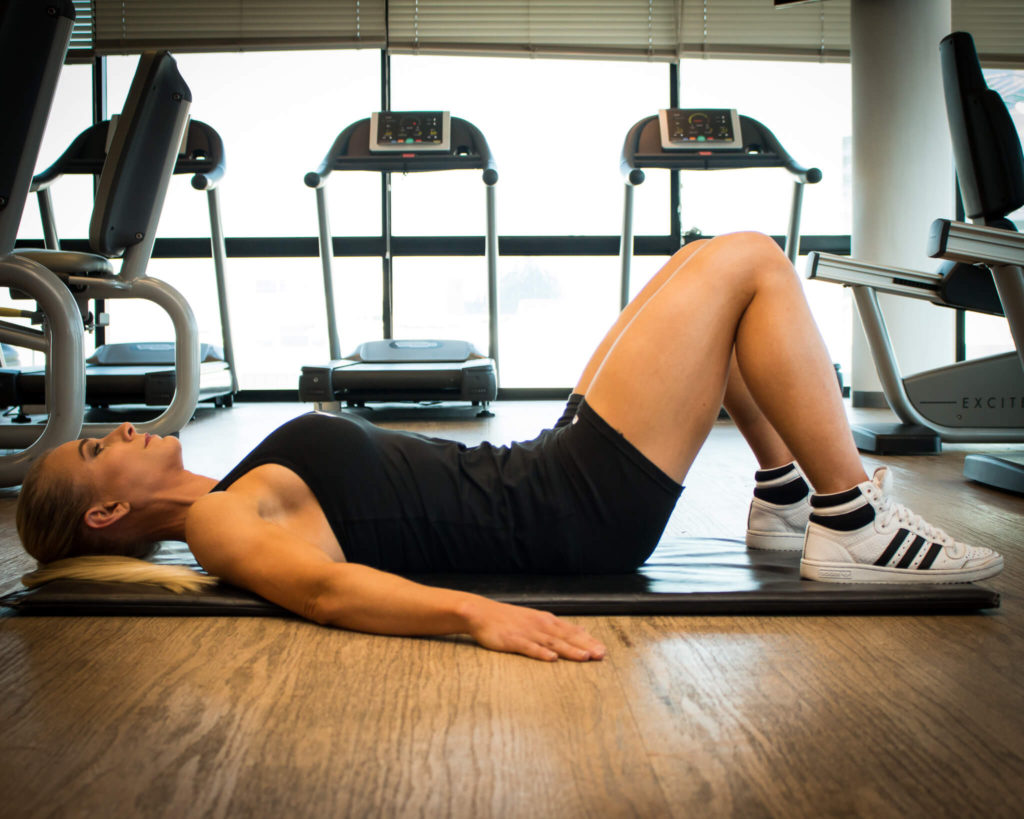
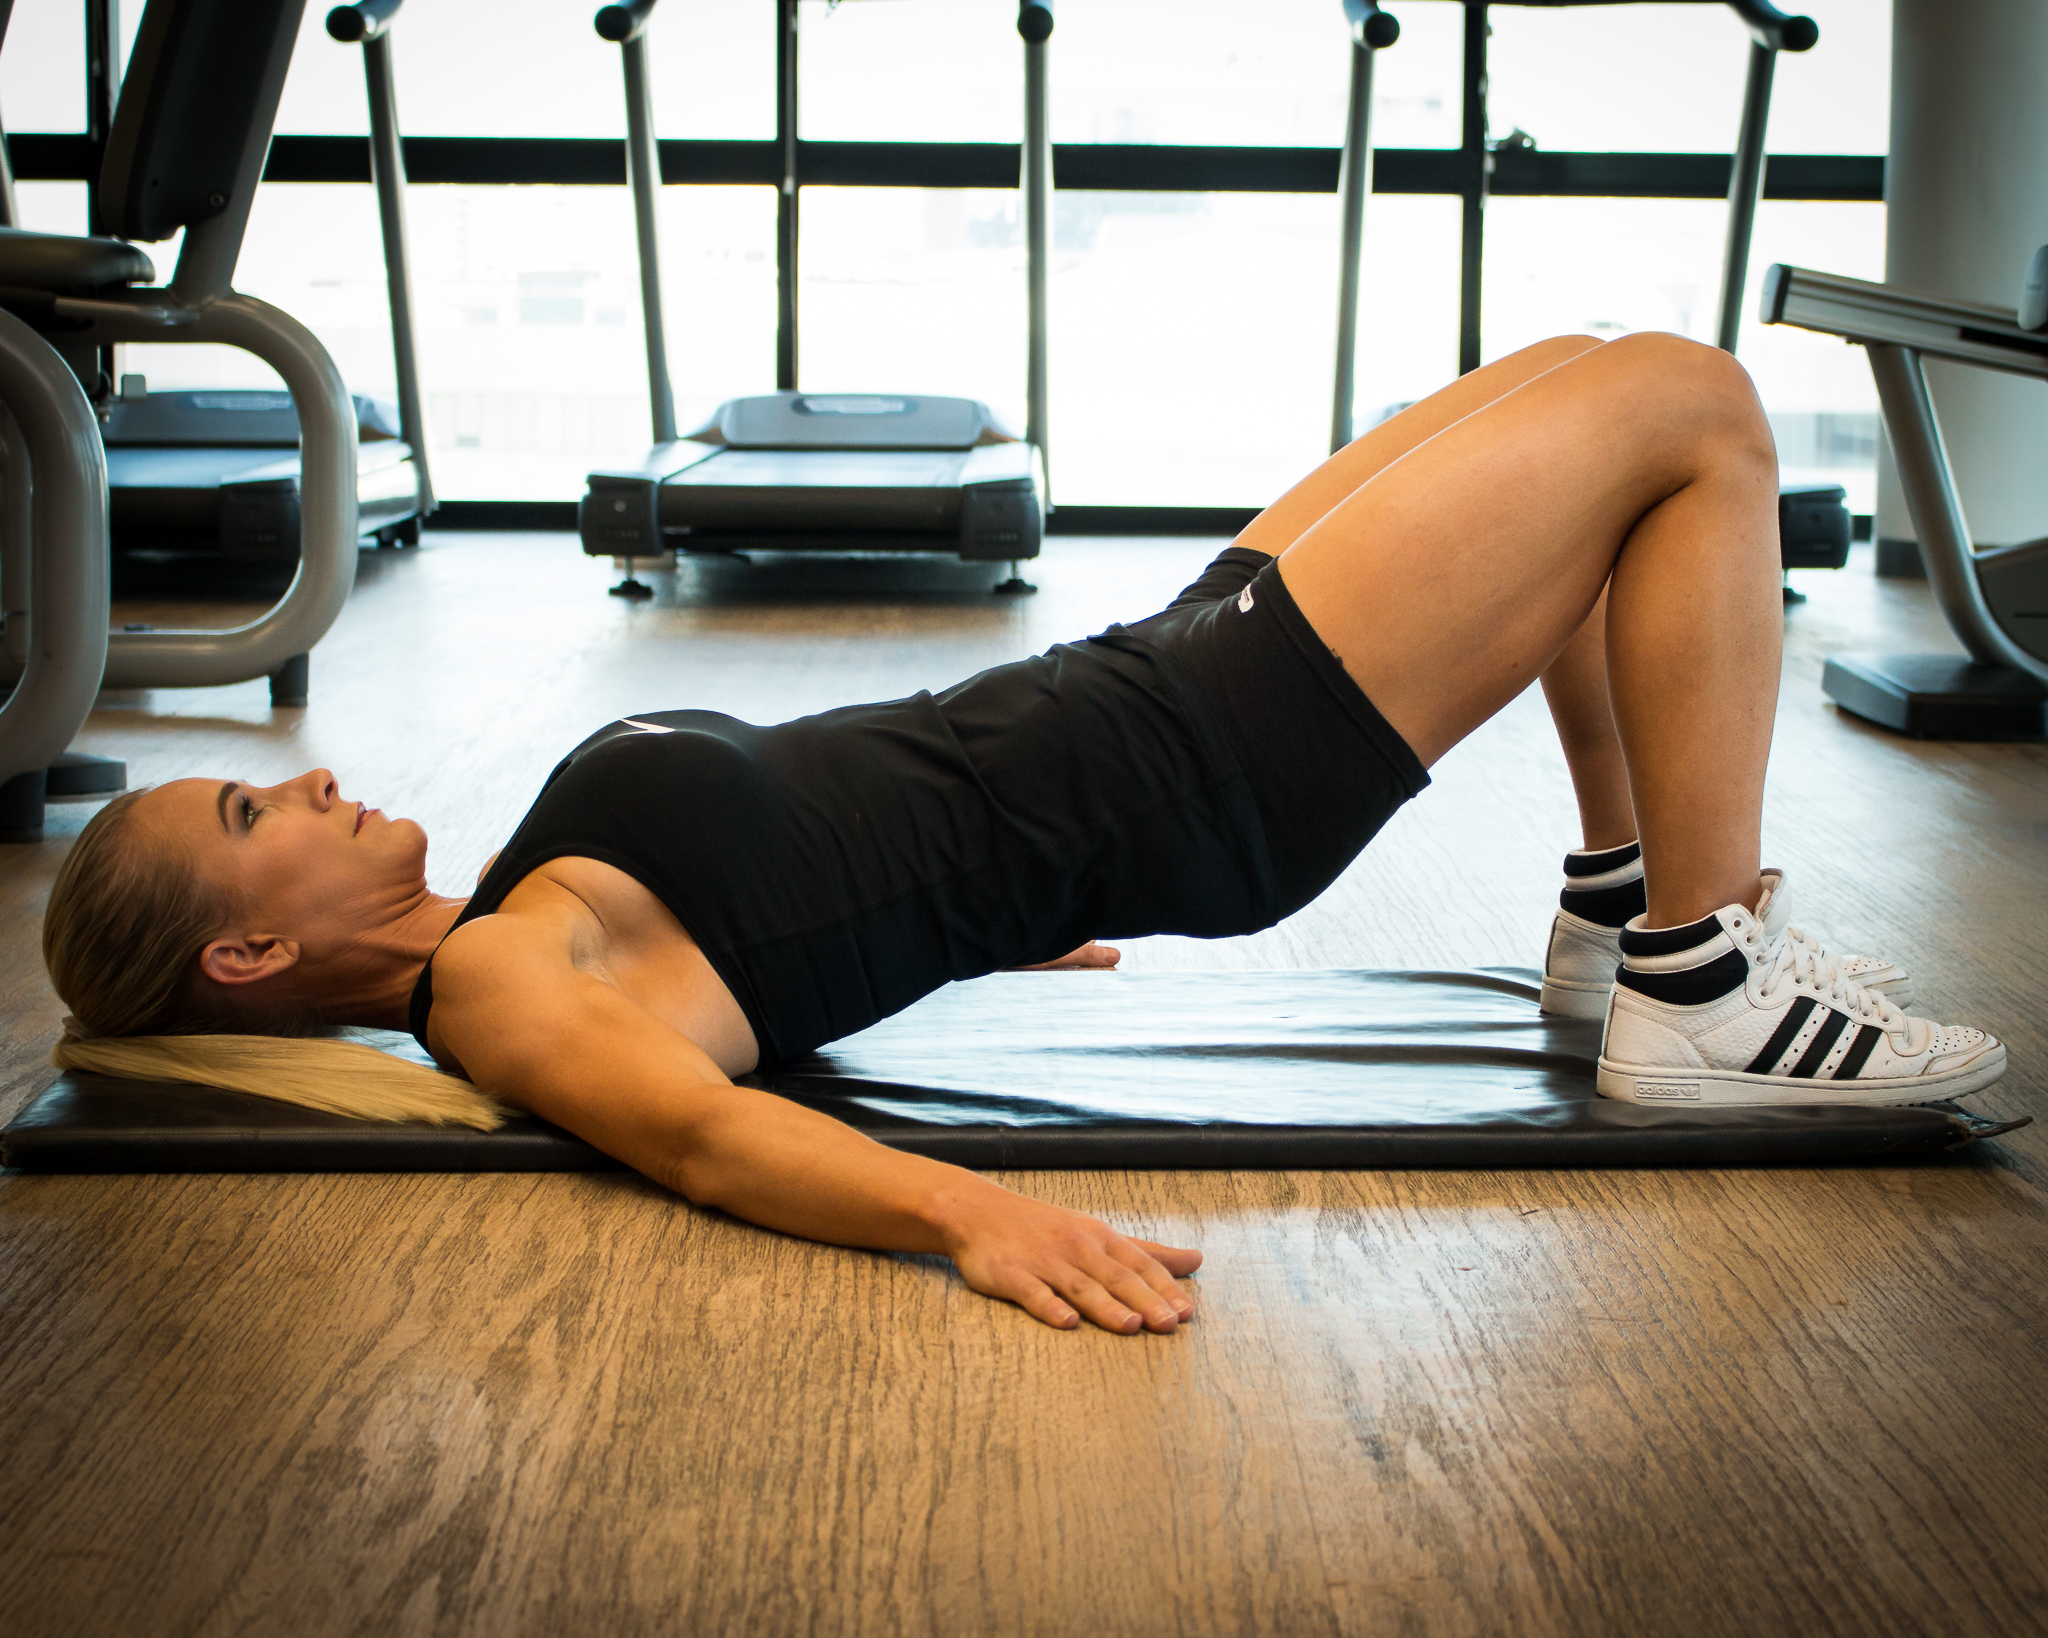
Roll ups bridge(1)
- Starting Position: Lying on your back, arms by your sides, head relaxed, and a small gap between your lower back and the matt (neutral spine – NS).
- Now inhale, and as you exhale, flatten your lower back onto the matt, drawing your belly towards your spine, tilting your pelvis and ‘tucking’ your tailbone underneath you (imprinted spine – IS).

- Continue this movement of ‘tucking’, and lift your vertebrae slowly one by one off the matt from your lower back, through your mid back, to your upper back.
- Until your knees, hips and shoulders are all in one straight line.
- (Imagine a bicycle chain slowly lifting off the floor one nodule at a time).
- Keep your core engaged throughout this lift.
- Once at the top, hold for 2 seconds, inhale and as you exhale, reverse this movement, slowly lowering one vertebrae at a time back down to the matt – from your upper back, to your mid back, and lastly to your lower back and pelvis. Release back to the starting position (NS).
- Repeat this 10 times, 3 sets.
- NB – ensure that you keep your neck and arms relaxed throughout this movement.
Knees side to side (1-3)
- Starting position: Lie on your back with your knees bent and your arms by yoursides, pelvis in NS. Keeping the knees together and feet on the floor, inhale, andas you exhale rotate them to on side, going as low as you can whilst keeping theopposite shoulder on the floor. Inhale and exhale to bring them back to thecentre.
- Alternate sides each rep, focusing on going as low as you can, keeping weight inthe opposite shoulder, and keeping the knees together.
- Repeat this 20 times in total, 10 to each side.

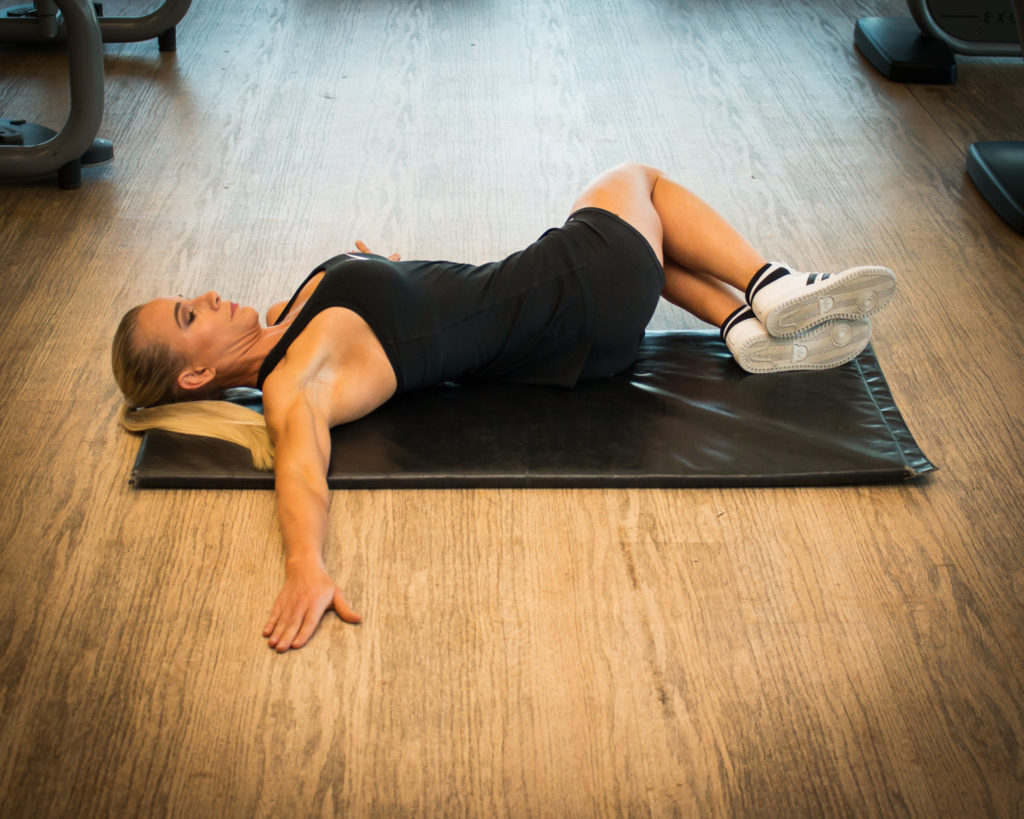
NB As much as this is a passive movement, try to engage your core and use your core muscles to move you from side to side.
Imagine you are holding a credit card between your knees, this is how closely you need to keep them, and hold them squeezed together.
Legs Over Ball – Knees Side to Side (2)
- Starting position: Lie on your back with your knees together and bent over a ball, arms relaxed by your side, in a NS.
- Inhale, and as you exhale, slowly take the knees over to one side as the ball rotates with you. Keep your opposite shoulder on the matt, going only as far as you feel comfortable whilst the shoulder remains in contact with the matt.
- Inhale and as you exhale slowly move back to the starting position.
- Repeat this 20 times in total, 10 to each side.
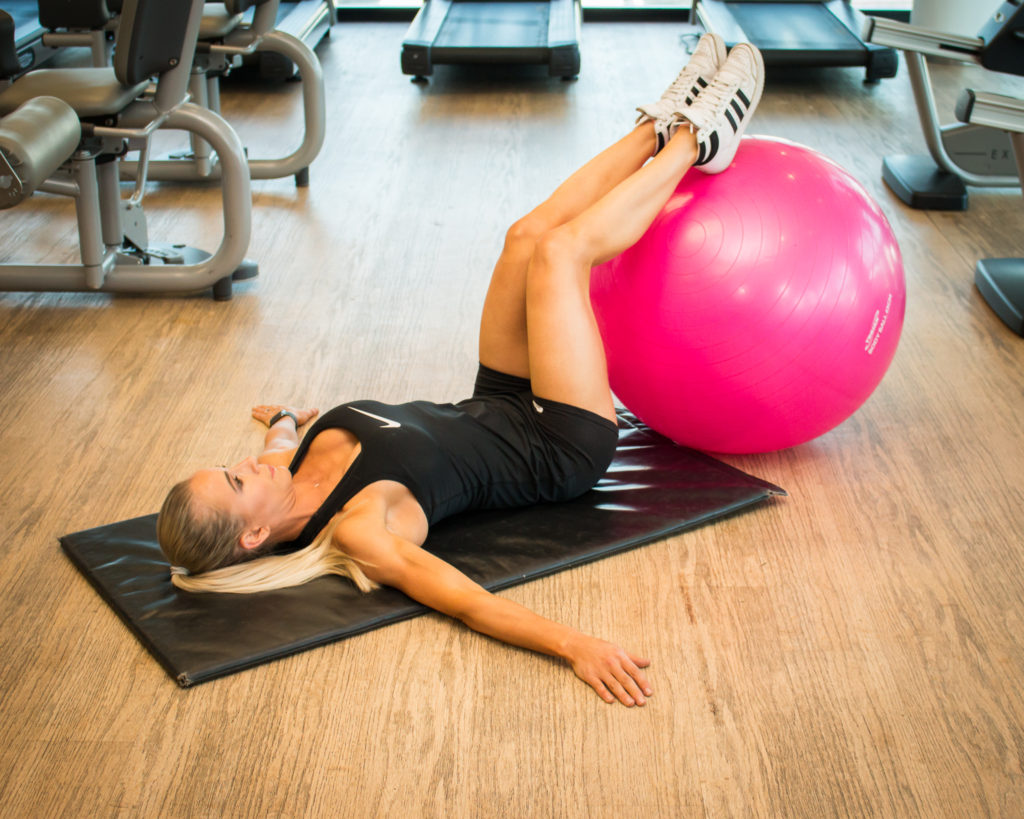
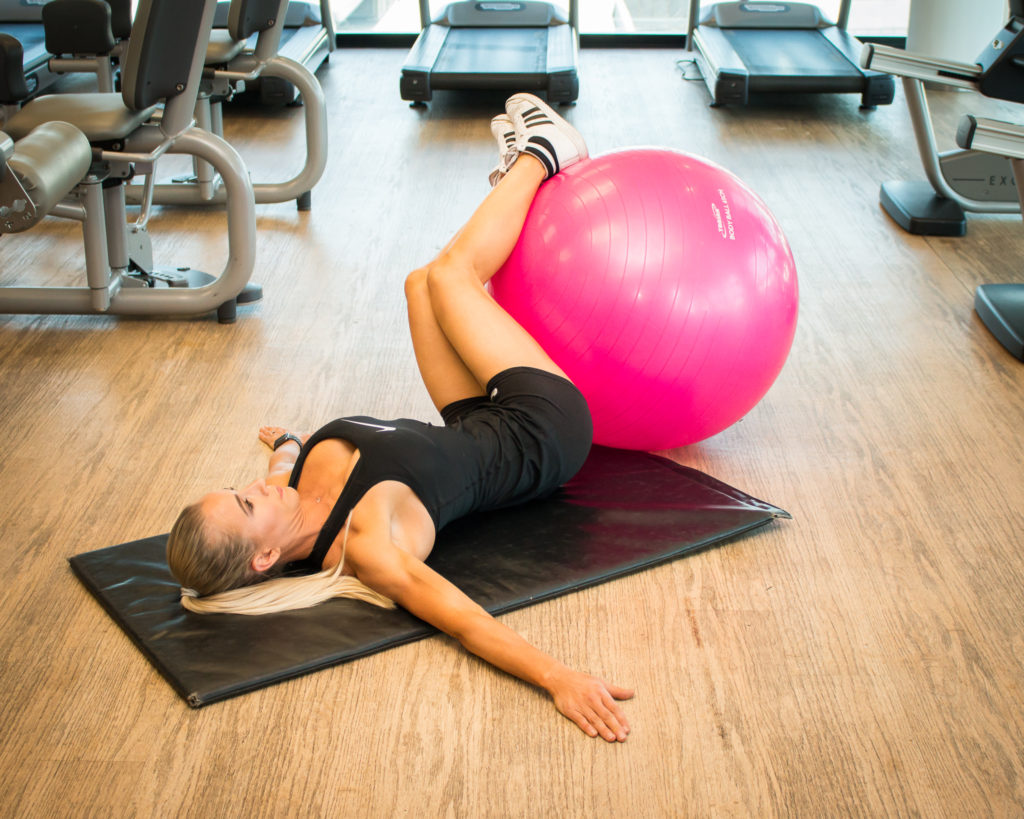
NB This exercise is a mobility drill however does require some obliquemuscle activation, therefore always move slowly and with control.
Cross Over Stretch (1-3)
- Starting position: Lie on your back with one knee bent, the other straight and relaxed on the matt. Take the knee that is bent and move it across your body holding it in position with one hand, letting the other arm stay on the floor relaxed, with your head looking in this same direction. Inhale and as you exhale aim to move this leg further across your body, allowing for a deeper stretch.
- Repeat 3 x reps to each side
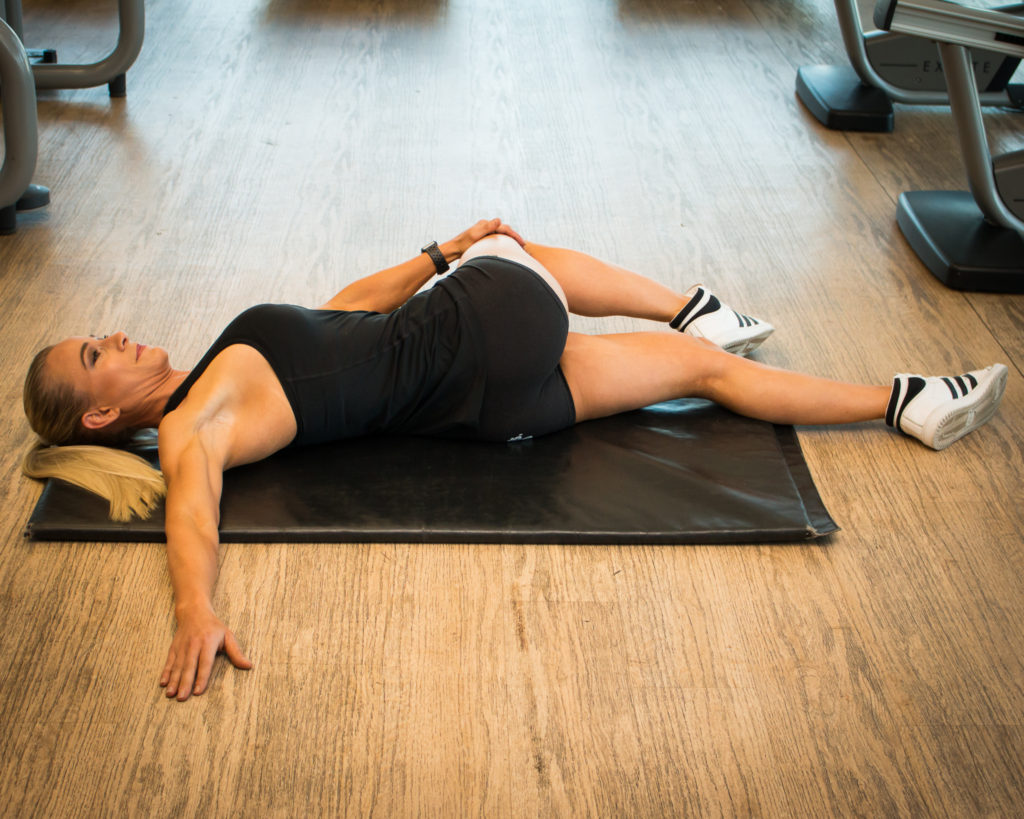
NB Keep the opposite arm connected to the floor and head relaxed.
Prayer Stretch (1-3)
- Starting position: Sitting on your haunches with your knees bent and your glutes resting on your heels. Walk your hands forward as far away from you as you can so that your back is straight and your arms stretched out. Try to keep your weight in your heels, and pull your spine forward using your arms but keeping your anchor in your lower back. Hold this stretch for 10 seconds, before you slowly walk your hands back, and come back to the seated position.
- Repeat x 2 for 10 seconds.
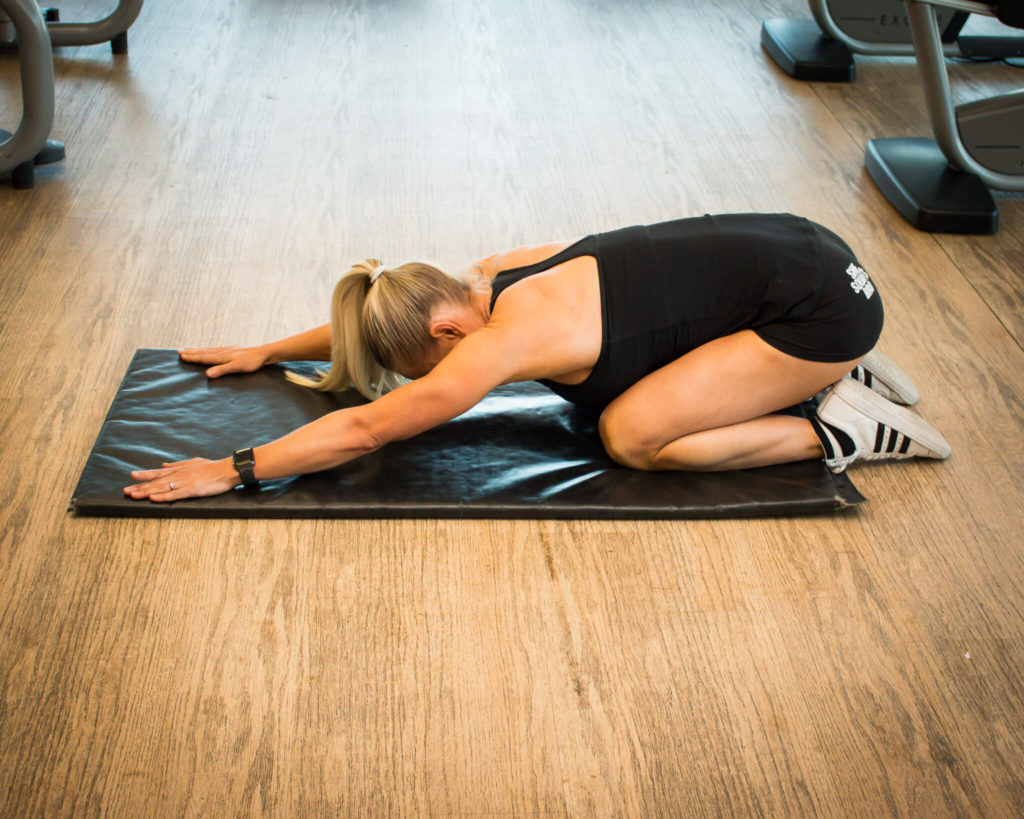
Variation:
- Once forward in the prayer stretch, you can walk both hands over to the left or the right, and remain there until you feel the stretch pull down the one side of the spine.
- Repeat x 2 each side for 10 seconds.
NB Don’t push too much into the hands, as you don’t want to strain the shoulders.
Prayer with Cross Over Stretch (1-3)
- Starting position: Sitting on your haunches with your knees bent and your bum resting on your heels. Walk your hands forward as far away as you can so that your back is straight and your arms are stretched out. Try to keep your weight in your heels, and pull your spine forward using your arms. Take one arm and place it underneath your other arm reaching it under and across your body, palm facing up, let your head rest on the matt. Reach as far as you feel comfortable, keeping your glutes resting on your heels.
- Repeat x 2 on each arm for 10 seconds.
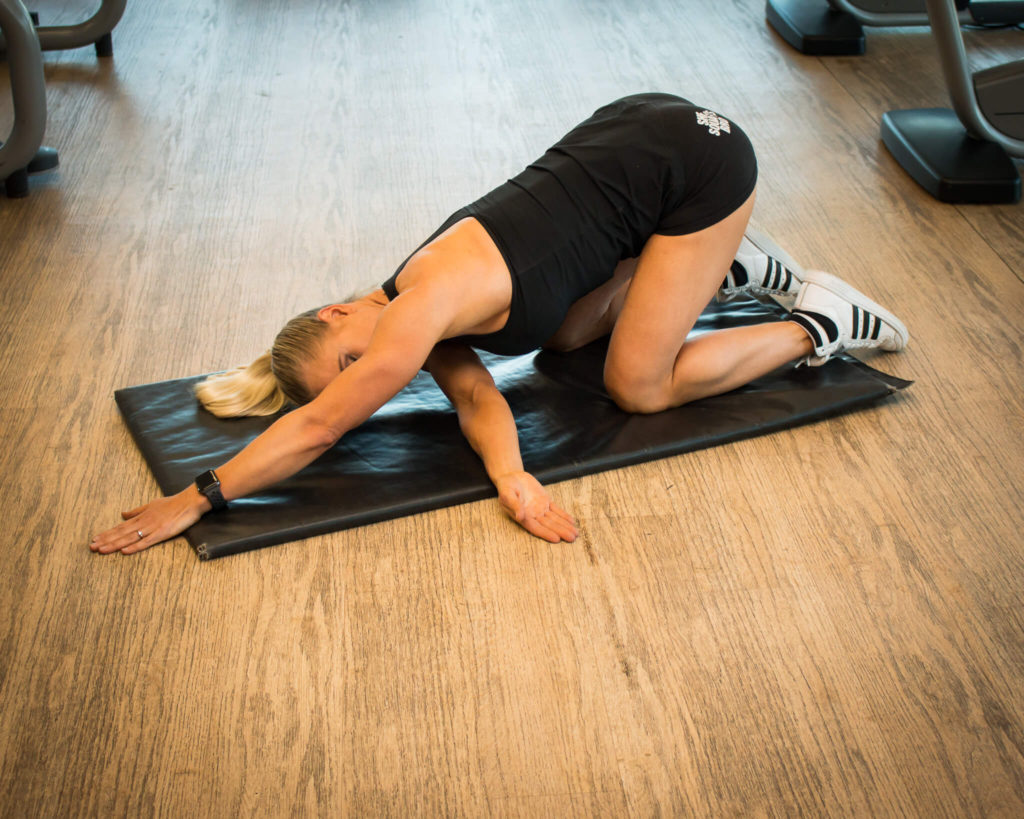
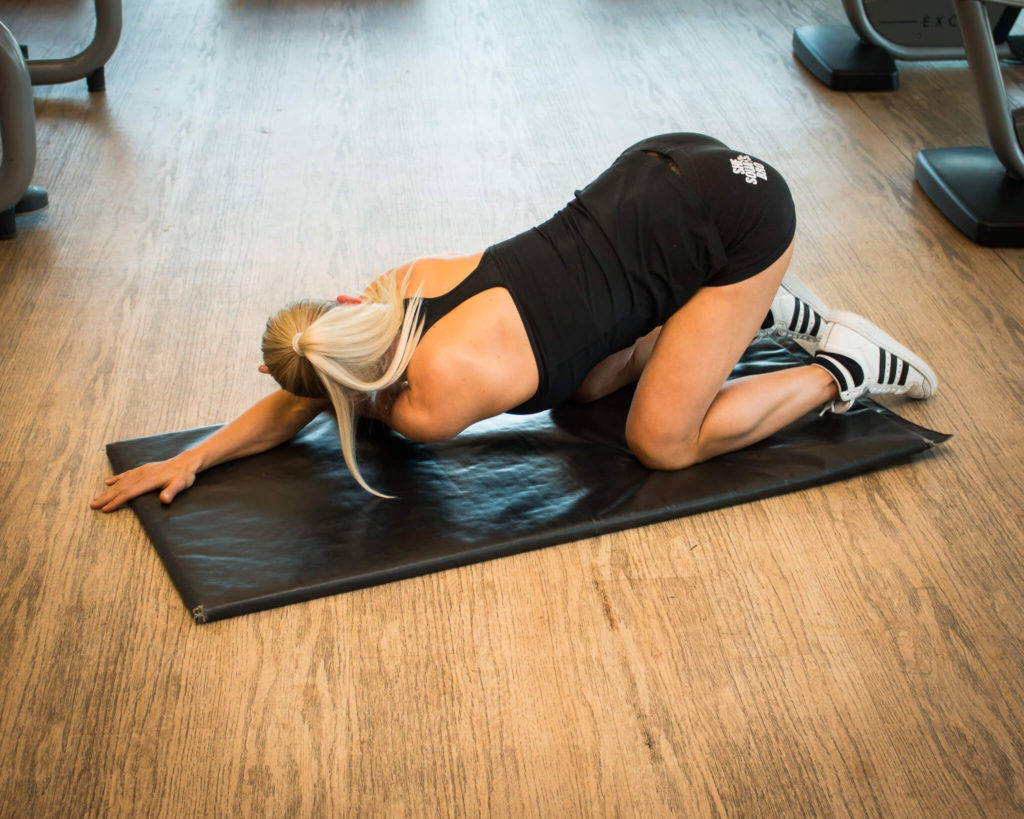
Cat Stretch and Cow Stretch (1-3)
- Starting position: Place your hands and knees, with equal weight on all fours, on a matt. Inhale, and as you exhale, push through, and round your shoulders, tuck your chin to your chest and tuck your tailbone underneath you as much as you can simultaneously and engage your core.
- Your back should be now shaped like a half moon. Release this movement and move both your back and head in the opposite direction so that your back is now arched and in more of a U shape, also using a slow breath to get to that position.
- Repeat 3-5 times to each direction, 3 sets.
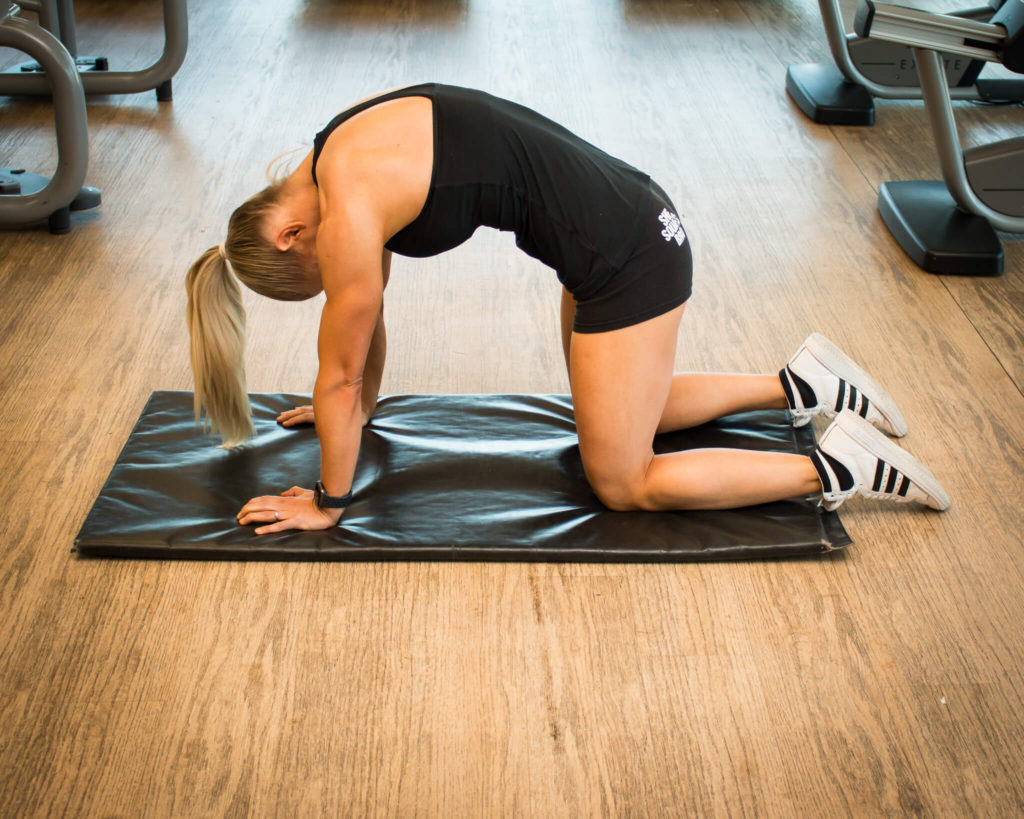
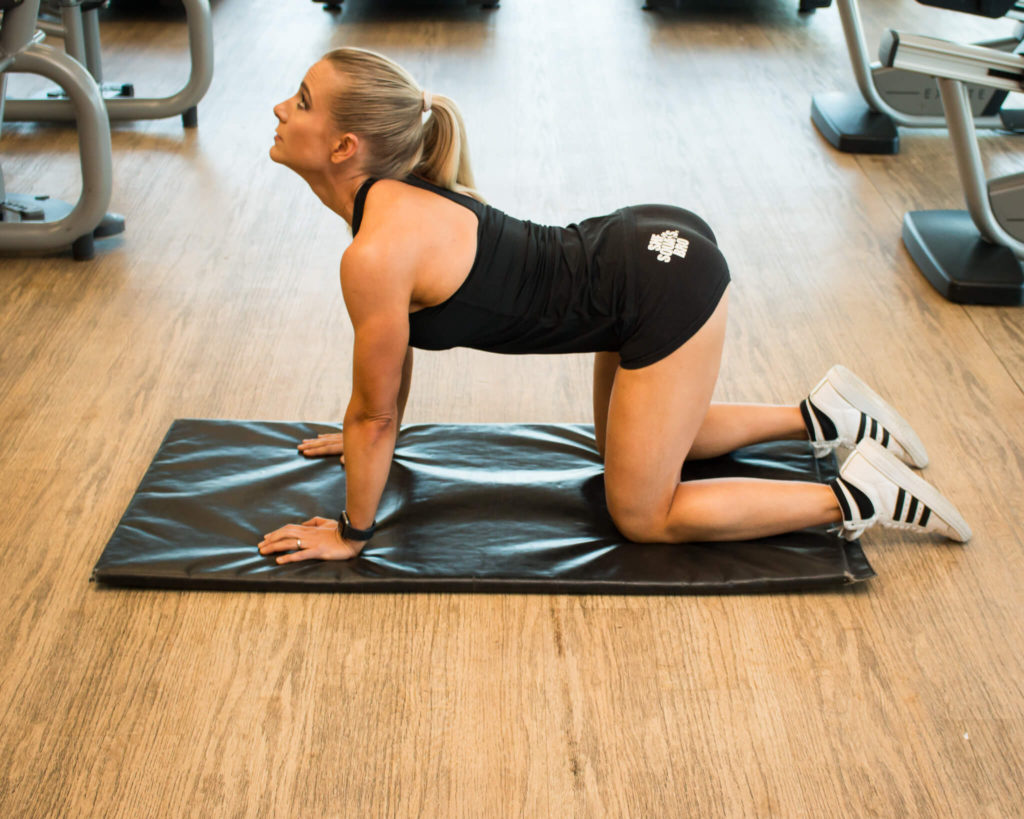
NB don’t force the range of motion, only move through a range that is comfortable.
Nerve Stretches for the Lower Back (1-3)
Variation 1
- Starting position: Lying on your back, with one knee bent and the other leg straight with a band placed around the ball of the foot (shoe on).
- Keeping your hands by your sides, and starting with the leg straight, slowly bend and straighten the leg, feeling a gentle stretch going throughthe back of your hamstring.
- Repeat this 20 times on each leg.
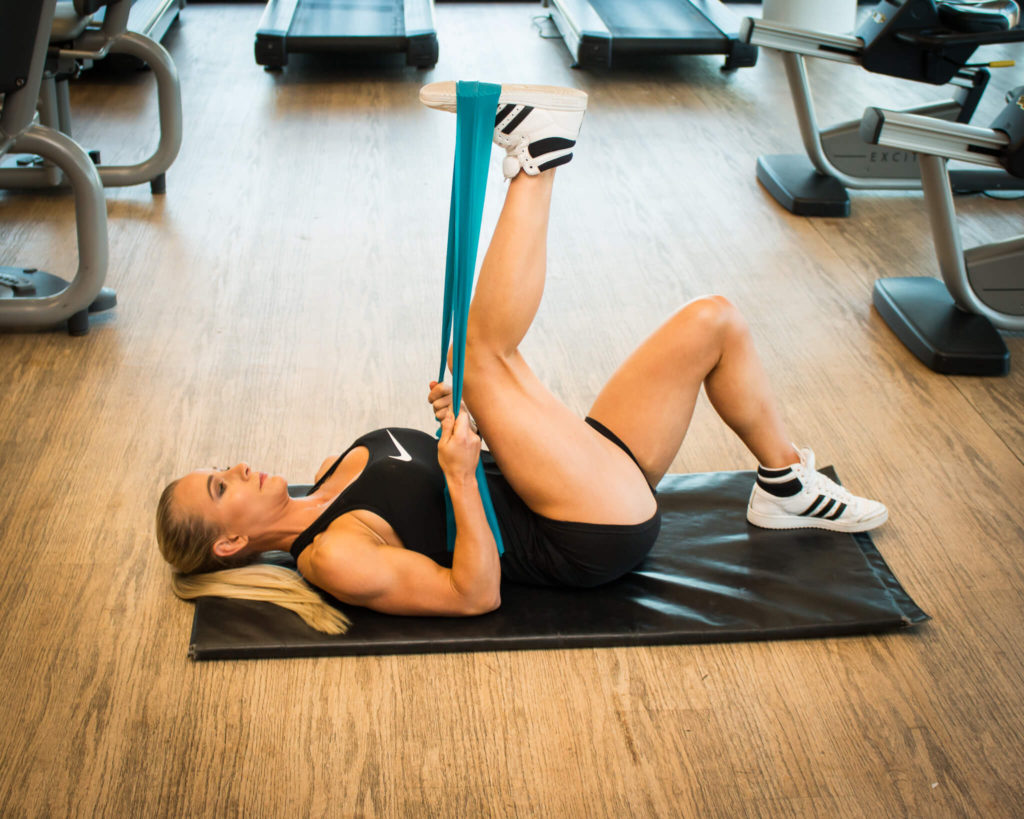
NB if the stretch is too intense you can bend the other leg to reduce the tension on the leg you are stretching.
Variation 2
- Starting position: Lying on your back, with one knee bent and the other leg straight with a band placed around the ball of the foot (shoe on). Using the band, turn this foot inwards towards the centre line (middle of your body), and then move this leg in the same direction so that you feel the stretch on the outside of your leg.
- Repeat this 20 times on each leg, 3 sets per leg.
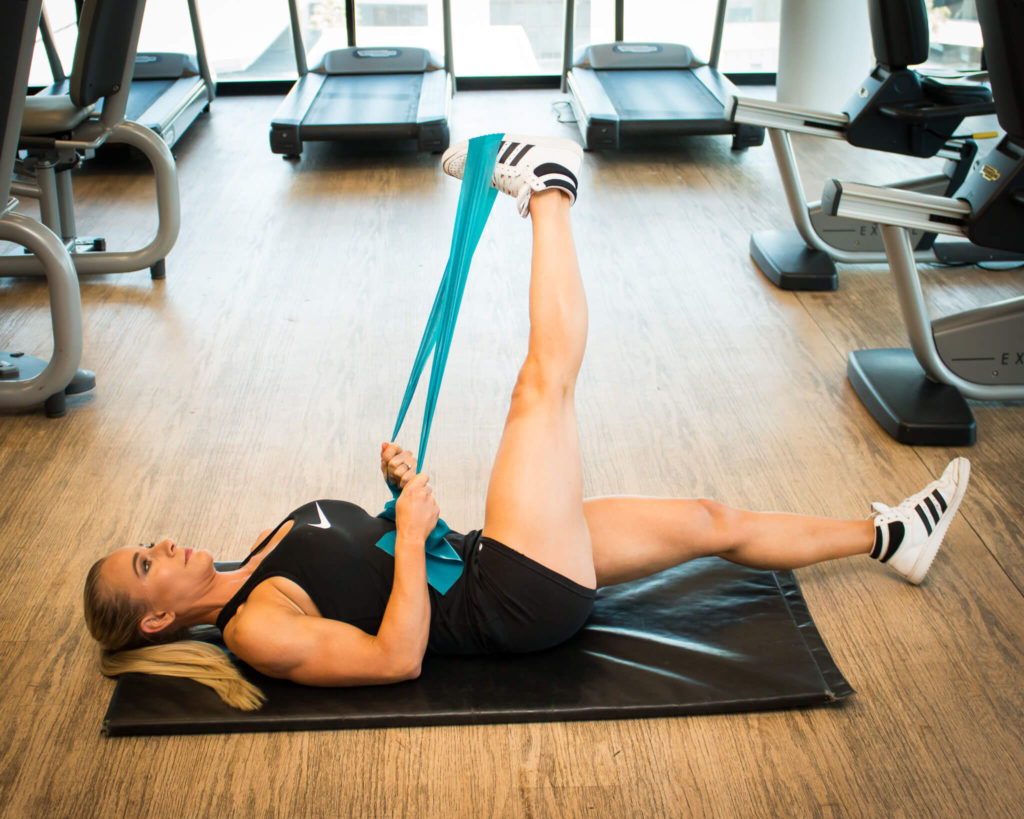
NB if the stretch is too intense you can bend the other leg to reduce the tension on the leg you are stretching.
Variation 3
- Starting position: Lying on your back with one knee bent, and the other straight, with a band placed around the ball of the foot (shoe on). Slowly point the foot, and flex the foot, keeping the tension on the hamstring as you do this and this leg straight.
- Repeat this 20 times on each leg, 3 sets per leg.
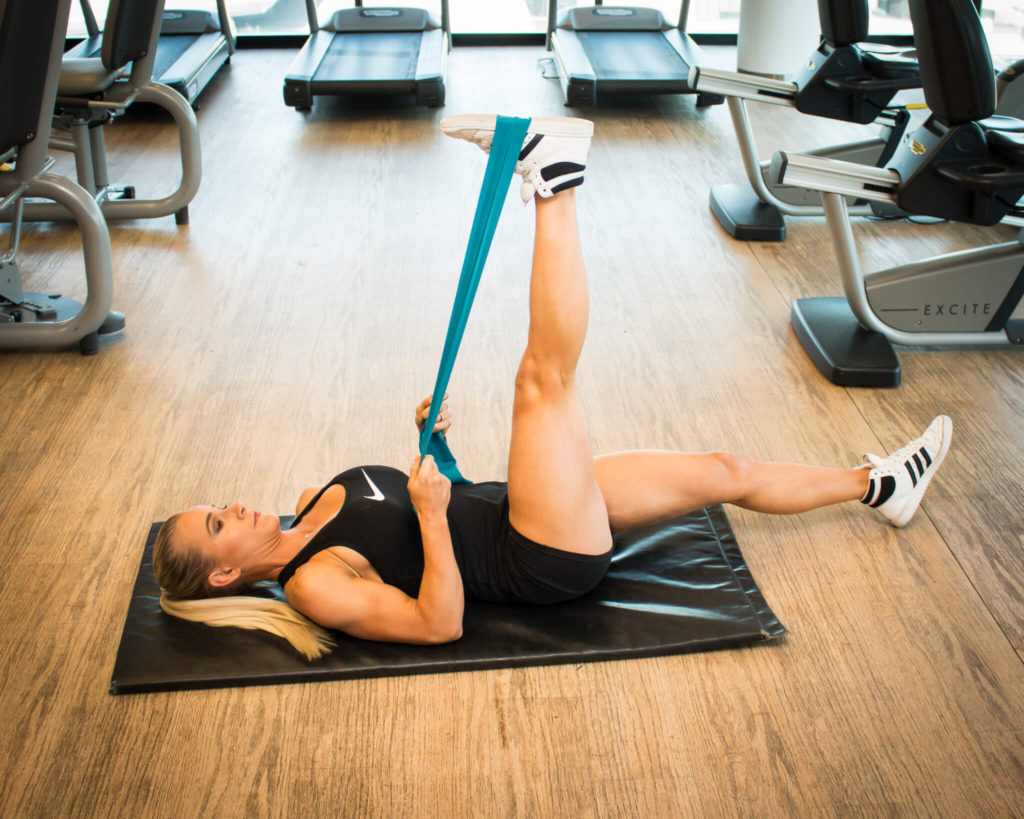
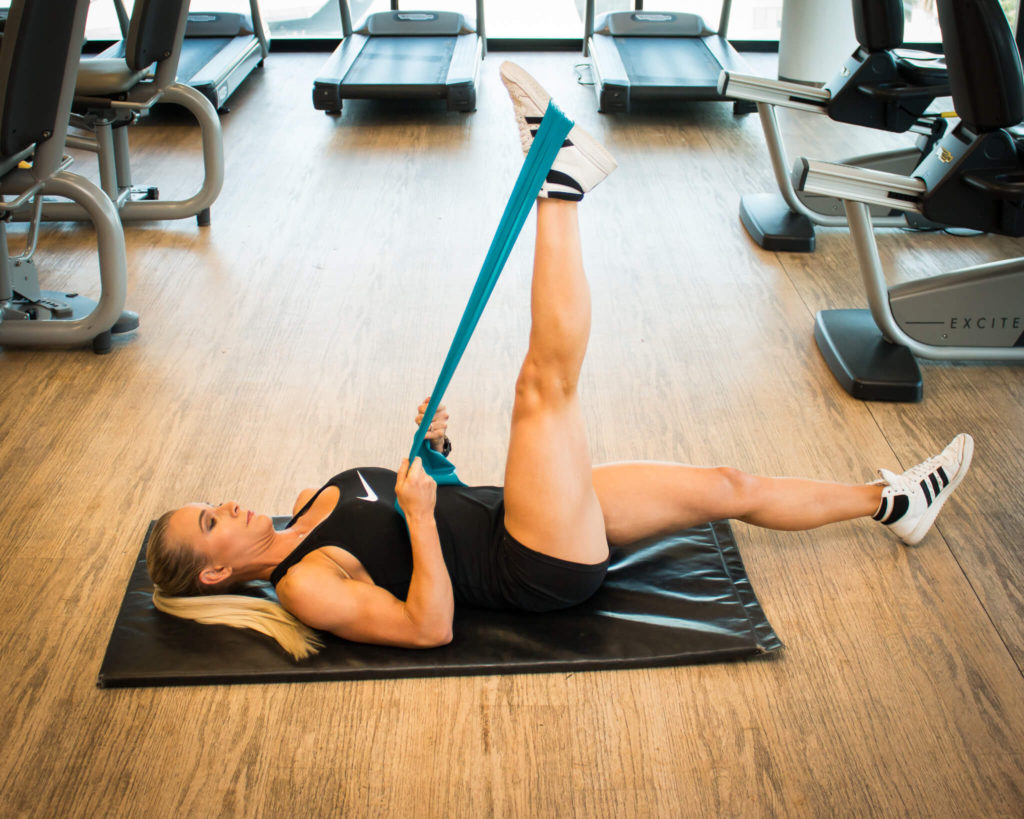
NB if the stretch is too intense you can bend the other leg to reduce the tension on the leg you are stretching.
Rolling (1-3)
Rolling before or after a workout is a great way to release tight and sore muscles. Take care that you are not rolling too hard or too often and try not to pause too long on a particularly sensitive area.
I personally recommend maximum twice per week as a general inclusion, however if you are dealing with a chronic injury, once to twice a day will suffice to assist with releasing a spasm or assist with releasing adhesions.
You can alter the speed at which you roll, both slow and faster movements will assist in releasing your muscles. Always however start with slower movements.
NB Remember to breathe throughout to assist with releasing tension in the muscles
Upper, Mid and Lower Back Rolling
- Lying with your shoulder blades on the roller and your knees bent, hips raised off the floor in a bridge position, using your feet as your lever move your back up and down the roller. You have your hands crossed at your chest or behind your neck if your neck starts to strain.
- Repeat 3 sets of 20 rolls.